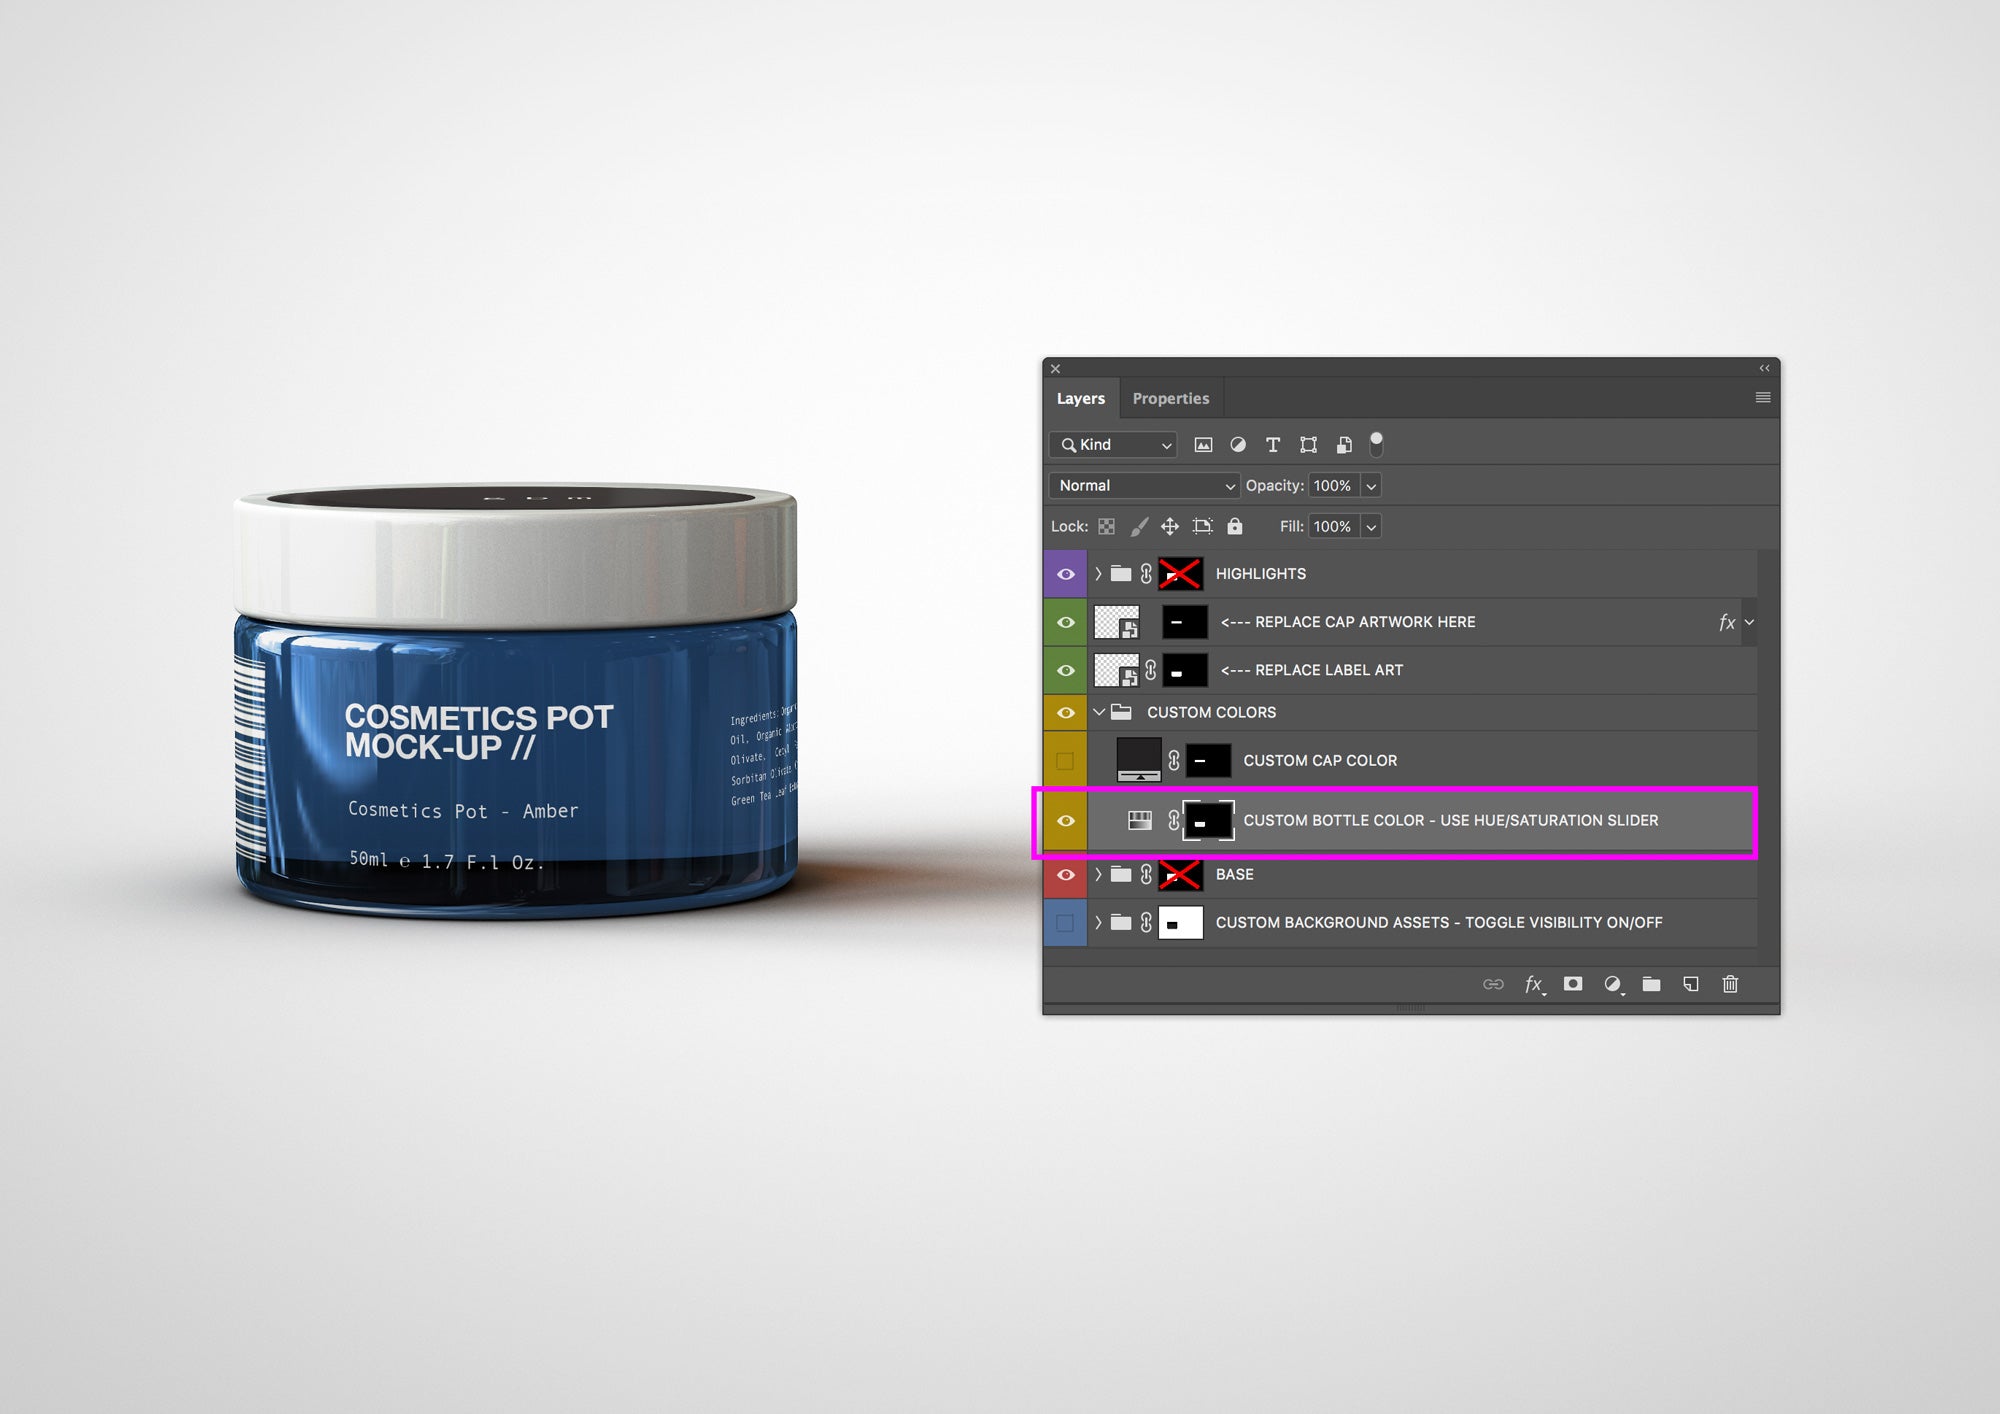
In each of our product mock-ups you are able to adjust the transparency of the glass objects in the scene by editing the 'Lightness' parameter of the 'Hue/Saturation' Adjustment Layer found in the 'CUSTOM COLORS' Folder.
**This Adjustment Layer also controls the Custom Glass Color!
So with this adjustment layer you can create a completely transparent glass object or adjust the parameters and tint the object any color you like.
These 3 simple steps below can be applied across our entire mock-up collection to give your glass objects a transparent look!
Step 1:
Open the 'LAYERS' Dialogue Box (Found in the application menu "Window" --> "Layers") and locate the FOLDER named CUSTOM COLORS - inside this folder locate the Adjustment LAYER named 'CUSTOM BOTTLE COLOR - USE HUE/SATURATION SLIDER'...
Step 2:
Double Click... (or Right Click ---> 'Edit Adjustments') on the Adjustment LAYER named 'CUSTOM BOTTLE COLOR - USE HUE/SATURATION SLIDER' to open up the Properties dialogue box for the Hue/Saturation...


Step 3:
With the Hue/Saturation Properties dialogue box now open... Locate the 'Lightness' slider and drag the slider to the right - somewhere from 0 to 100. Around 90 is a good start, but you can adjust this to your liking, remember the closer you are to 100... the more transparent your glass will be... but will not show any glass color or tint if set too high... (so dial this back to around 80 if you want your object to show color & transparency. Your Hue & Saturation paramaters will also need to be relatively adjusted to your liking in this case.)


Hint: It is also possible to give your glass a color tint while still maintaining a balance between color & transparency. Experiment a little and play with the Lightness, Hue and Saturation slider values. It's easy to see what effects can be achieved straight away! From here you can color the object any color you like and control the opacity and density of the glass.


